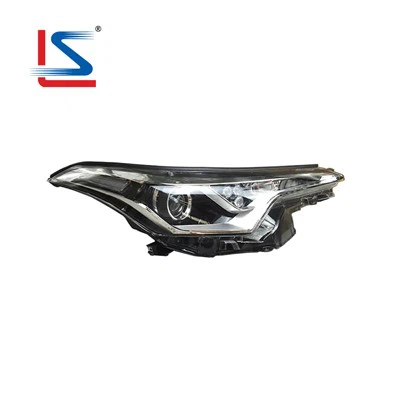
Hey there, fellow Land Cruiser enthusiasts! As a supplier of Land Cruiser headlamps, I get asked a ton about how to check the wiring of these essential components. A well - functioning headlamp wiring system is crucial for your safety on the road, so let's dive right in and learn how to check it out.
Why Checking Headlamp Wiring Matters
First off, why should you even bother checking the headlamp wiring? Well, faulty wiring can lead to a bunch of problems. Your headlamps might not turn on at all, or they could flicker, which is super dangerous when you're driving at night. Sometimes, bad wiring can even cause a short circuit, which might fry your headlamp bulbs or, in the worst - case scenario, start a fire. So, keeping an eye on your headlamp wiring is a must.
Tools You'll Need
Before you start checking the wiring, gather these tools:
- A multimeter: This is like a Swiss Army knife for electrical work. It can measure voltage, resistance, and continuity.
- A test light: It's a simple tool that lights up when there's electricity flowing through it.
- Some basic hand tools like screwdrivers and pliers to open up the headlamp housing and access the wiring.
Step 1: Safety First
Before you do anything, make sure your Land Cruiser is turned off and the keys are out of the ignition. This will prevent any accidental shocks or short circuits while you're working on the wiring. Also, wear some safety gloves and goggles to protect yourself from any sharp edges or electrical sparks.
Step 2: Inspect the Headlamp Housing
Open up the headlamp housing. Usually, there are some screws or clips that hold it in place. Once you've removed the housing, take a good look at the wiring. Check for any obvious signs of damage, like frayed wires, cuts, or melted insulation. If you see any of these, you've probably found the problem. But even if there are no visible signs, it doesn't mean everything is okay.
Step 3: Check the Fuses
The fuses are like little guardians of your electrical system. They're designed to blow and cut off the electricity if there's too much current flowing. Find the fuse box in your Land Cruiser. It's usually under the dashboard or in the engine compartment. Look for the fuses related to the headlamps. You can check the owner's manual to find out which ones they are. Use the test light to see if the fuses are working. If the test light doesn't light up when you touch it to both ends of the fuse, then the fuse is blown and needs to be replaced.
Step 4: Test the Wiring Continuity
This is where the multimeter comes in handy. Set your multimeter to the continuity setting. It usually looks like a little sound wave symbol. Now, disconnect the wiring harness from the headlamp bulb. Touch one probe of the multimeter to one end of the wire and the other probe to the other end. If the multimeter beeps, it means there's continuity, which is good. If it doesn't beep, then there's a break in the wire somewhere. You might need to trace the wire along its path to find the break.
Step 5: Check the Voltage
Set your multimeter to the voltage setting. Reconnect the wiring harness to the headlamp bulb. Turn on your Land Cruiser's ignition and switch on the headlamps. Touch the probes of the multimeter to the terminals of the headlamp bulb. You should get a reading close to the battery voltage (usually around 12 volts). If the voltage is significantly lower, it could mean there's a problem with the wiring or a bad connection.


Step 6: Examine the Ground Connection
A good ground connection is essential for the headlamps to work properly. Look for the ground wire in the wiring harness. It's usually a black wire. Check to see if it's securely attached to the vehicle's frame. Use the multimeter to test the resistance between the ground wire and the frame. It should be close to zero ohms. If the resistance is high, it means there's a bad ground connection, and you'll need to clean the connection or tighten it up.
Step 7: Look at the Switches
The headlamp switch in your vehicle controls when the headlamps turn on and off. Sometimes, the switch can go bad. You can use the multimeter to test the switch for continuity. Remove the switch and check the different positions to see if the electricity is flowing as it should. If the switch is faulty, it'll need to be replaced.
Common Wiring Problems and Solutions
- Corrosion: Over time, moisture can get into the wiring connections and cause corrosion. If you see any green or white powdery stuff on the connections, clean it off with a wire brush and some electrical contact cleaner.
- Loose Connections: Vibration from driving can cause the wiring connections to become loose. Make sure all the connectors are tightly plugged in. You can use some dielectric grease to prevent future corrosion and keep the connections tight.
Our Headlamp Offerings
As a Land Cruiser headlamp supplier, we've got a wide range of high - quality headlamps to suit your needs. We also offer headlamps for other Toyota models. For example, check out our AUTO HEAD LAMP Headlight for TOYOTA IST XA 2005 81105 - 52520 L 81106 - 52520 312 - 1185, Car Headlights for Toyota 2020 Yaris Lamp Assembly 81110 - YL020 81150 - YL020 Yaris Headlight, and Auto Headlight for TOYOTA REIZ MARK X 2008 - 2009 Car Headlights BLACK 112 - 1125 R 81110 - 0P011 L 81150 - 0P011. These headlamps are designed to meet the highest standards of quality and performance.
Contact Us for Purchasing
If you're in the market for new headlamps or have any questions about headlamp wiring, don't hesitate to get in touch. We're here to help you find the right headlamps for your vehicle and offer you top - notch customer service. Whether you're a DIY enthusiast or a professional mechanic, we've got what you need.
References
- "Automotive Electrical Systems Handbook"
- "Toyota Land Cruiser Repair Manual"