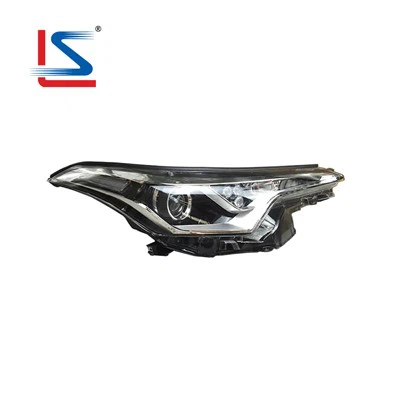
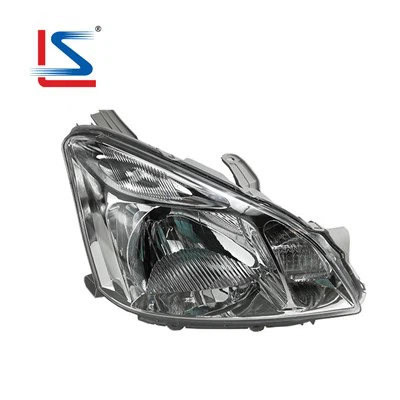
As a dedicated supplier of 2010 Prius headlights, I understand the crucial role that proper sealing plays in the performance and longevity of these automotive components. A well - sealed headlight not only ensures optimal lighting but also protects the internal components from moisture, dust, and debris, which can significantly degrade the headlight's functionality over time. In this blog, I'll share some essential steps and tips on how to ensure that the 2010 Prius headlight is properly sealed.
Understanding the Importance of Headlight Sealing
Before delving into the sealing process, it's important to grasp why proper sealing is so vital. The 2010 Prius headlight is a complex assembly that houses sensitive electrical components, bulbs, and reflectors. When moisture seeps into the headlight, it can cause condensation to form on the inside of the lens. This not only diffuses the light output, reducing visibility for the driver, but can also lead to corrosion of the electrical contacts, which may result in bulb failure or erratic lighting performance.
Dust and debris can also enter an unsealed headlight. Over time, this accumulation can scratch the lens, reduce the effectiveness of the reflectors, and even cause mechanical problems within the headlight assembly. Therefore, maintaining a tight seal is essential for keeping the headlight in top - notch condition.


Inspecting the Headlight Assembly
The first step in ensuring proper sealing is to conduct a thorough inspection of the headlight assembly. Start by removing the headlight from the vehicle following the manufacturer's instructions. This usually involves removing a few screws or clips that hold the headlight in place.
Once the headlight is removed, carefully examine the sealing gasket. The gasket is the rubber or silicone strip that creates the seal between the headlight housing and the lens. Look for any signs of wear, damage, or deformation. Cracks, tears, or flattening of the gasket can all compromise the seal. If the gasket shows any of these issues, it's recommended to replace it with a high - quality replacement gasket. You can find suitable gaskets from reliable automotive parts suppliers.
Also, inspect the headlight housing and the lens for any cracks or damage. Even a small crack can allow moisture and debris to enter. If you find any cracks, it may be necessary to replace the entire headlight assembly or, in some cases, attempt a repair using a suitable automotive epoxy. However, be aware that a repaired crack may not provide a perfect seal and could still pose a risk in the long run.
Cleaning the Sealing Surfaces
Proper cleaning of the sealing surfaces is a critical step that is often overlooked. Before installing a new gasket or re - assembling the headlight, clean both the headlight housing and the lens thoroughly. Use a mild automotive cleaner and a soft cloth to remove any dirt, grease, or old gasket residue.
Pay special attention to the grooves in the headlight housing where the gasket sits. These grooves can accumulate dirt over time, which can prevent the new gasket from seating properly. Use a small brush, such as an old toothbrush, to gently scrub these areas. Rinse the surfaces with clean water and dry them completely using a lint - free cloth. Make sure there is no moisture left on the surfaces before proceeding with the sealing process.
Choosing the Right Sealing Material
When it comes to sealing the 2010 Prius headlight, choosing the right material is of utmost importance. As mentioned earlier, a high - quality replacement gasket is a must. Look for gaskets made from durable materials such as EPDM (Ethylene Propylene Diene Monomer) rubber, which is known for its excellent resistance to weathering, temperature changes, and chemicals.
In addition to the gasket, some people may opt to use a sealing adhesive to further enhance the seal. There are various types of automotive - grade adhesives available on the market. Silicone - based adhesives are a popular choice because they are flexible, waterproof, and can withstand a wide range of temperatures. However, when using an adhesive, make sure to follow the manufacturer's instructions carefully. Apply the adhesive evenly around the sealing area, but be careful not to apply too much, as excess adhesive can squeeze out and interfere with the proper fit of the headlight components.
Re - Assembling the Headlight
Once the sealing surfaces are clean and dry, and the new gasket (and possibly adhesive) are ready, it's time to re - assemble the headlight. Carefully place the gasket on the headlight housing, ensuring that it fits snugly into the groove. If you're using adhesive, apply it to the gasket or the mating surface of the housing as directed.
Then, align the lens with the headlight housing. Make sure that the lens is properly positioned and that the gasket is evenly compressed between the two parts. Slowly and carefully press the lens onto the housing, starting from one side and working your way around. Apply gentle but even pressure to ensure a good seal.
After the lens is in place, re - attach any clips or screws that hold the headlight together. Make sure they are tightened to the correct torque specification. Over - tightening can damage the housing or the gasket, while under - tightening can result in a loose seal.
Testing the Seal
Once the headlight is re - assembled, it's essential to test the seal before reinstalling it in the vehicle. One simple way to test the seal is to use a water spray bottle. Spray a fine mist of water around the edges of the headlight, focusing on the areas where the gasket is located.
Observe the inside of the headlight for any signs of water penetration. If you see water droplets forming on the inside of the lens, there is a leak in the seal. In this case, you'll need to disassemble the headlight again, check the gasket and the assembly, and make any necessary adjustments.
Another method is to use a smoke machine. A smoke machine can be used to introduce a small amount of smoke into the headlight housing. If there is a leak in the seal, the smoke will escape, allowing you to easily identify the location of the leak. This method is more accurate but may require some specialized equipment.
Maintaining the Seal
Proper maintenance is key to ensuring that the headlight remains properly sealed over time. Regularly inspect the headlight for any signs of damage or wear. This should be part of your routine vehicle maintenance schedule.
Avoid using harsh chemicals or abrasive cleaners on the headlight lens or housing, as these can damage the sealing gasket and the headlight components. When washing the vehicle, be gentle around the headlight area and avoid using high - pressure water directly on the headlight.
If you live in an area with extreme weather conditions, such as high humidity or heavy snow, take extra precautions. Consider applying a protective coating to the outside of the headlight lens. This can help prevent moisture from adhering to the lens and reduce the risk of condensation.
Related Products
If you're interested in other Toyota headlight products, we also offer a wide range of high - quality options. For example, we have the TOYOTA RAV4 2008 Head Lamp 212 - 11N7 Car Headlights Accessories 81130 - 42430 81170 - 42430 RAV4 Headlight, which is designed to provide excellent lighting performance and durability.
We also supply the Auto HID Headlight for TOYOTA PREMIO 2004 - 2007 20 - 439 81110 - 20A10 81150 - 20A10, known for its energy - efficient and bright illumination. And for those looking for headlights for a 2009 - 2014 Prius, we have the Auto Headlight for TOYOTA PRIUS 2009 - 2014 head lamp R 81130 - 47231 L 81170 - 47231 L 81150 - 47231 R 81130 - 47510 PRIUS Headlight.
Conclusion
Properly sealing the 2010 Prius headlight is a multi - step process that requires attention to detail and the use of high - quality materials. By following the steps outlined in this blog, you can ensure that your 2010 Prius headlight remains in optimal condition, providing reliable lighting and protection for the vehicle's internal components.
If you're in the market for 2010 Prius headlights or need advice on headlight sealing, feel free to reach out to us. We're here to assist you with all your automotive headlight needs and are eager to engage in productive procurement discussions.
References
- "Automotive Lighting Systems" - A technical manual on automotive lighting published by a leading automotive engineering association.
- Toyota Prius 2010 Service Manual - Official documentation provided by Toyota for vehicle maintenance and repair.
- Various automotive parts supplier catalogs for information on gaskets and headlight replacement parts.